Basic constructions

The Vesica Piscis construction divides a circle into four equal parts and its diameter into two. This construction is both beautiful and symbolic. However, from the drawing point of view it is not the most practical. If we wish to use it to construct a square, it requires a change of the radius and then return to the original. We can never return to a radius with complete accuracy and even though these changes are on a micro-scale they do add up and often make a difference to the drawing as a whole.
Our drawings, being hand-made, will always be imperfect and therein lies their beauty. However, I would suggest that, where the accuracy of our drawing is concerned we should strive for perfection and charitably accept our imperfections.
If we are solely seeking the divisional aspect, and not the aesthetics of the Mandorla or its symbolisms, then the following method is simpler and does not require radius change. It also allows to attain the four-fold division on a larger scale than with the Vesica Piscis without the need of a compass extension bar. This is because the compass needs to open solely to the radius length and not to the diameter length of our circle.
Materials:
compass
30cm ruler
H or 2H pencil
A4 printer paper
card or cutting mat
eraser
Notes:
place the A4 printer paper in portrait position
the radius of approx. 7,5cm will give a neat drawing on A4 but keep in mind that this construction works regardless of the measurement of the radius and can be scaled up or down according to needs
this is a preliminary step to drawing a Quincunx
the below construction brings forth other divisions of the circle and these will be discussed in following tutorials
please use the contact button should you have any queries or would like to share your work

1) Find the middle of the A4 page in the portrait orientation.

2) Place your compass needle in the middle of the page and with radius of approx. 7,5 cm draw a circle. Mark the circle centre as point Z.

3) Draw a horizontal line across the circle. Allow the line to extend through the circumference of the circle on both left and right. Make sure this line accurately crosses point Z. Mark intersections A and B.
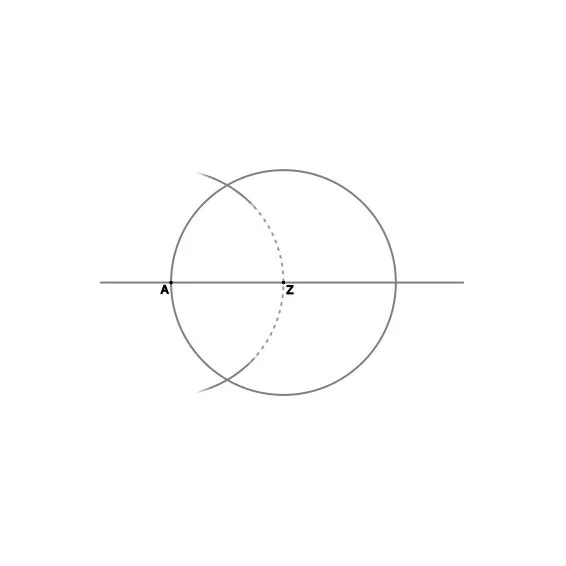
4) Place compass needle in point A and with the original radius, AZ, draw an arch which will cross the circle circumference both above and below the horizontal line. Because it is the intersection points which are important, it is not necessary to draw the arch in full.

5) Mirror the previous action from point B. This will give two intersections on the circumference above the horizontal line, and two intersections below the horizontal line.
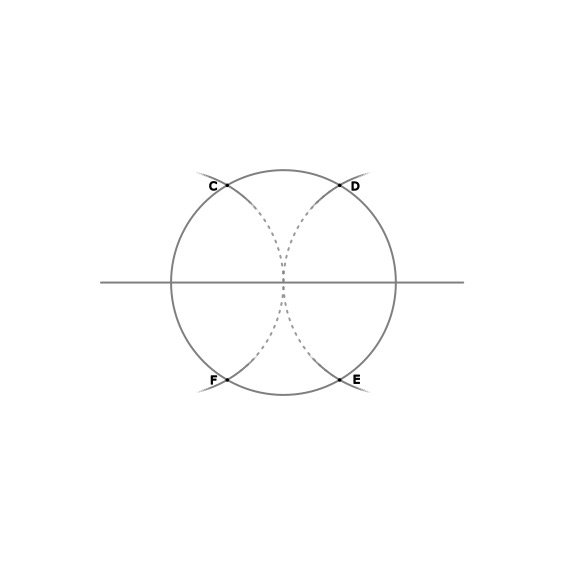
6) Mark these intersections as points C, D, E and F.

7) Place compass needle in point C and with the original radius, AZ, draw an arch which should cross the circle circumference at point D and extend above the circle. The arch should be about 1/4 of a circle.

8) Mirror the previous action from point D. There should now be an intersection above the original circle.

9) In the same fashion, place the compass needle in point F and with the original radius, AZ, mark an arch which should cross the circle circumference at point E and extend below the circle.

10) Mirror the previous action from point E. There should now be an intersection below the original circle.

11) Mark the above intersection as point G and the below intersection as point H.

12) Join points G and H with a vertical line. It should cross point Z exactly.

13) This construction divides the circle into four equal parts and the diameter of the circle (segment AB) into two equal parts without the need to change the compass radius.
14) The above division of the circle into four equal parts gives the whole construction its horizontal and vertical axes upon which the drawing can develop.
15) If short of drawing space above and/or below the circle, the arches marked from points C, D, E and F can be made with a radius smaller than the original radius of the circle. However, it is crucial that this new radius is identical for all the four arches. It also has to be wider than 1/2 of the original radius of the circle in order for the arches to create the above and below intersections.
16) If there is no space for even the smaller arches to be drawn, then it is possible to mark them inside the circle instead. This might however impact the accuracy of the vertical division line, as the two reference points, here called G and H, will be much closer to one another.

17) The vertical axis, created by joining points G with H, divides the segment AB into 2 equal parts. To gain a further division of this segment, into 4 equal parts, two more vertical lines need to be added: join point C with F, and point D with E.